
Setting up your accounting system correctly is one of the smartest moves you can make for your business. If you’re an accountant, CMA professional, or someone already familiar with accounting software, Zoho Books can become your new best friend a cloud-based solution that simplifies everything from invoicing to tax compliance.
At Wamid Academy, we understand that transitioning to a new accounting system can feel intimidating at first. That’s why this guide will walk you through each step of setting up Zoho Books for your small business clearly, practically, and confidently.
Table of Contents
- Why Choose Zoho Books for Small Businesses
- Step 1: Create Your Zoho Books Account
- Step 2: Set Up Your Organization Profile
- Step 3: Configure Your Chart of Accounts
- Step 4: Add Taxes, Currencies, and Fiscal Settings
- Step 5: Customize Your Invoice Templates
- Step 6: Connect Your Bank Account and Automate Feeds
- Step 7: Invite Your Team and Set Permissions
- Step 8: Test and Review Before Going Live
- FAQs About Setting Up Zoho Books
- Final Thoughts: Your Next Step to Accounting Efficiency
Why Choose Zoho Books for Small Businesses
Zoho Books is more than just an invoicing app it’s a full-fledged accounting platform built for efficiency and compliance. Whether you’re operating in the UAE, India, or other regions where Zoho Books is tax-compliant, the system simplifies your work with automation, local tax integration (like VAT/GST), and real-time insights.
Key Benefits:
- Automated bookkeeping and bank reconciliation
- Custom invoices with your brand logo
- Integration with Zoho ecosystem and third-party tools
- Built-in tax management (VAT/GST-ready)
- Multi-currency and multi-user support

Step 1: Create Your Zoho Books Account
Visit Zoho Books official site and sign up using your business email.
You can start with the free plan if your annual revenue is within local limits or choose a paid plan for advanced features.
Action Steps:
- Choose your country and business type.
- Verify your email address.
- Log in to your new Zoho Books account.
Use your company domain email (e.g., info@yourcompany.com) it adds professionalism and helps when inviting teammates later.
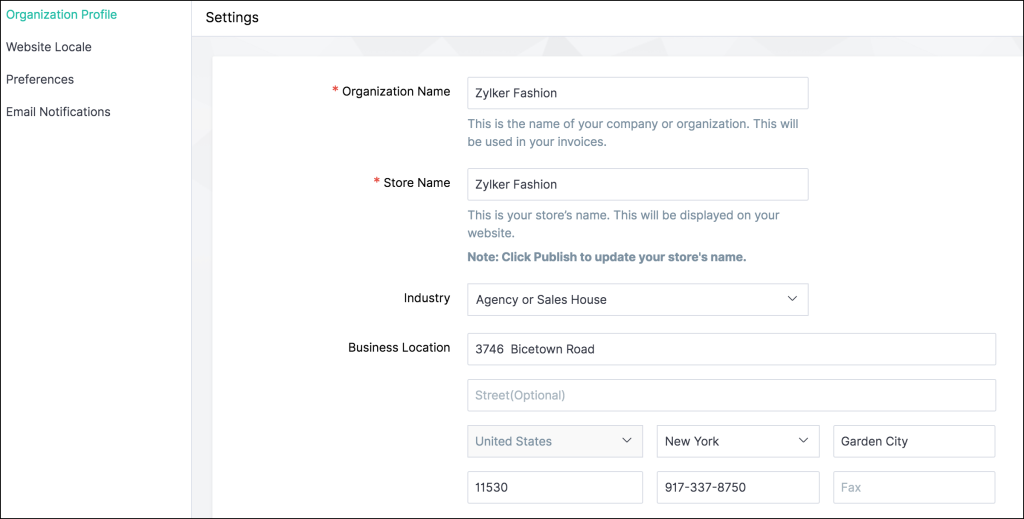
Step 2: Set Up Your Organization Profile
This step defines how your invoices, emails, and reports will appear.
Go to Settings → Organization Profile and fill in the following:
| Field | Example | Description |
|---|---|---|
| Company Name | Wamid Consulting FZE | Legal name for invoices |
| Address | Dubai, UAE | Will appear on official documents |
| Logo | PNG or SVG (300x100px) | Adds professional branding |
| Time Zone | GST | Matches local reporting time |
| Base Currency | AED | Currency for accounting |
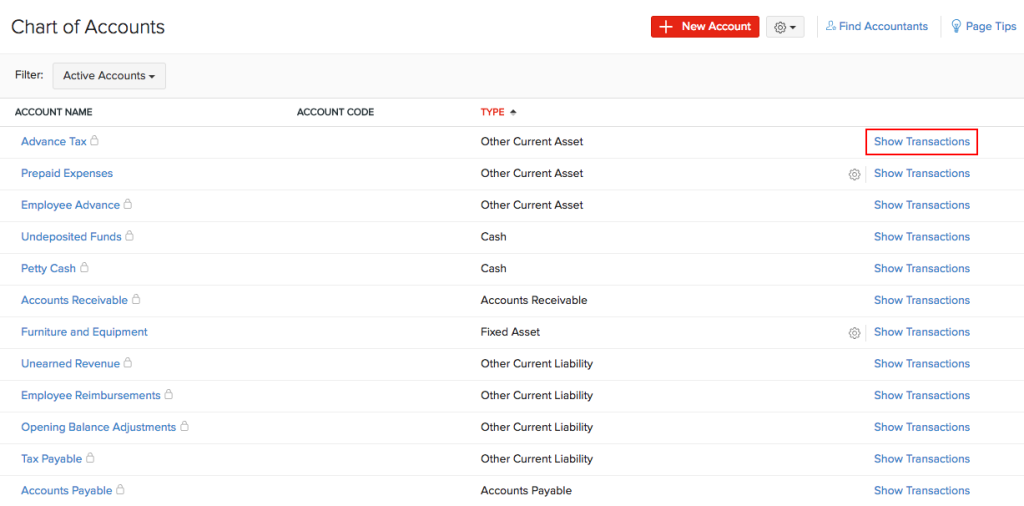
Step 3: Configure Your Chart of Accounts
Your Chart of Accounts (COA) is the backbone of your financial data.
Zoho Books provides default accounts like Sales, Purchases, Cash, and Accounts Receivable, but you can customize them to match your business structure.
Common Additions:
- Consulting Income
- Software Subscriptions
- Travel Reimbursements
- Bank Fees
Action Steps:
- Go to Settings → Chart of Accounts
- Add or edit account categories
- Assign account codes for consistency
Step 4: Add Taxes, Currencies, and Fiscal Settings
In countries like the UAE or India, it’s crucial to configure tax details accurately.
Action Steps:
- Navigate to Settings → Taxes
- Add VAT/GST rates based on local laws
- Choose your Fiscal Year Start and Base Currency
Zoho Books automatically handles tax reports, making VAT filing seamless.
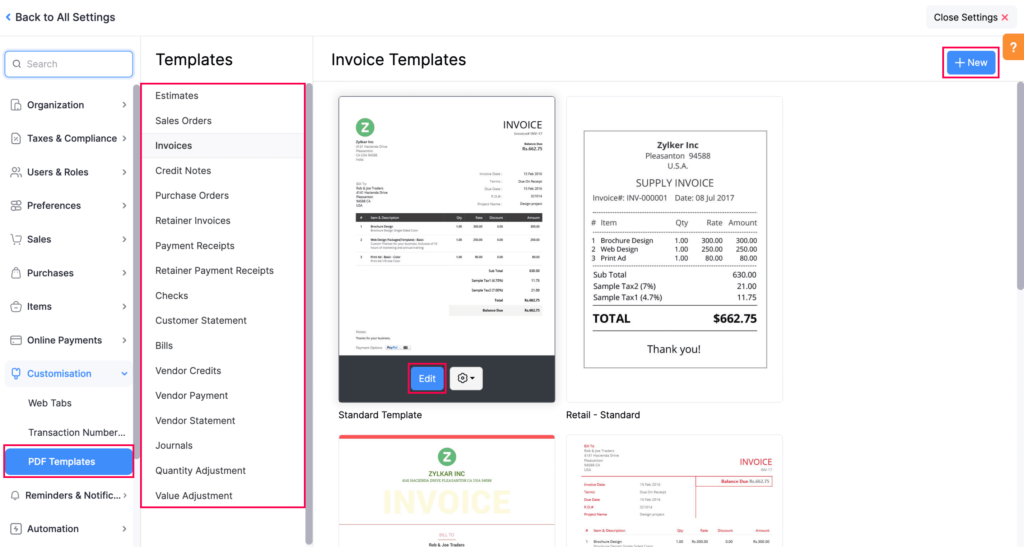
Step 5: Customize Your Invoice Templates
In Zoho Books, you can fully brand your invoices with colors, fonts, and terms.
Action Steps:
- Go to Settings → Templates → Invoices
- Choose a style and click Edit
- Add your logo, payment terms, and digital signature
- Enable online payments through Razorpay, Stripe, or PayPal
Step 6: Connect Your Bank Account and Automate Feeds
Automation saves time. Zoho Books allows you to link your business bank account securely.
Action Steps:
- Go to Banking → Add Bank or Credit Card
- Search your bank and connect via secure authentication
- Enable Auto Bank Feeds
Use bank rules to automatically categorize recurring transactions like rent, utilities, or software subscriptions.
Step 7: Invite Your Team and Set Permissions
If you work with other accountants or assistants, you can give them controlled access.
Action Steps:
- Go to Settings → Users & Roles
- Click Invite User and enter their email
- Assign roles such as Admin, Accountant, or Staff
Zoho Books uses role-based permissions to maintain security.
Step 8: Test and Review Before Going Live
Before you start recording real transactions:
- Enter a few sample invoices and expenses
- Test payment gateways
- Generate a trial balance report
Once satisfied, delete the test data and begin your official operations confidently.
FAQs About Setting Up Zoho Books
Q1: Is Zoho Books free for small businesses?
Yes, in many countries Zoho Books offers a free plan for businesses below a certain turnover limit (e.g., AED 50,000 in the UAE).
Q2: Can I migrate data from Excel or QuickBooks?
Absolutely. You can import CSV files for customers, invoices, and accounts directly through Settings → Data Import.
Q3: Does Zoho Books support VAT/GST filing?
Yes. It’s officially FTA-compliant in the UAE and supports GST filing in India.
Q4: Can I integrate Zoho Books with other Zoho apps?
Yes, it integrates seamlessly with Zoho CRM, Zoho Inventory, and Zoho Projects for complete business management.
Q5: Is Zoho Books suitable for freelancers?
Definitely. Even if you’re a one-person business, you can automate invoicing, tax reports, and expense tracking easily.
Final Thoughts: Your Next Step to Accounting Efficiency
Zoho Books can completely change the way you handle finances making accounting faster, smarter, and paperless.
Whether you’re an accountant, CMA, or small business owner, now is the perfect time to start using Zoho Books the right way.
At Wamid Academy, we help learners master practical skills that make their work easier and more rewarding.
👉 Explore our Accounting and Zoho Books courses to learn hands-on setup and automation techniques for real business success.